Agristack Farmer Registry Portal: Login, Registration, Status Check & Farmer ID (All States Guide)
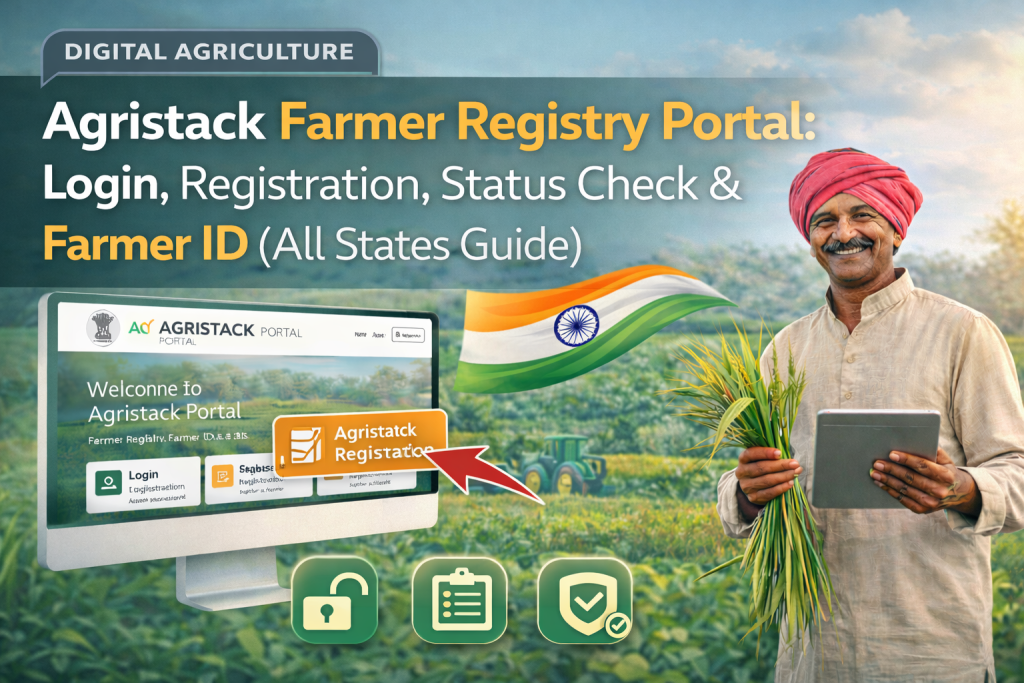
Agristack Farmer Registry Portal is a digital system used to manage farmer information in Digital Agriculture. It connects Agristack, Farmer Registry, and Farmer ID in one place so farmers can access services easily. Through the Agristack Portal, farmers can complete Agristack Login, Agristack Registration, and Agristack Status Check without visiting multiple offices.
The main purpose of Agristack is to create a proper Farmer Registry where each farmer gets a unique Farmer ID. This Farmer ID works like a digital identity, which helps track farmer records and applications. At the same time, the Agristack Dashboard and Agristack App make it easier to view updates, while Agristack CSC Login allows support through service centers.
Each state uses its own version of the Agristack Portal, such as UP Agristack, MHFR Agristack, and KLFR Agristack. These portals like upfr.agristack.gov.in, mhfr.agristack.gov.in, and klfr.agristack.gov.in provide state-level access for Farmer Registry processes. So, farmers can complete UP Farmer Registration, Maharashtra Login, Kerala Registration, and similar actions based on their state.
The system also includes features like Farmer ID download, Enrollment Status tracking, and Application Status updates. As a result, farmers can check their Approval Status and use their Farmer ID Card whenever needed. This makes Agristack a simple and organized way to handle Farmer Registry across all states.
Agristack State Portal List
Official state-wise Agristack Farmer Registry portal codes and URLs
| State | Portal URL | Portal Code |
|---|---|---|
| Uttar Pradesh | upfr.agristack.gov.in | UPFR |
| Maharashtra | mhfr.agristack.gov.in | MHFR |
| Kerala | klfr.agristack.gov.in | KLFR |
| Madhya Pradesh | mpfr.agristack.gov.in | MPFR |
| Chhattisgarh | cgfr.agristack.gov.in | CGFR |
| Gujarat | gjfr.agristack.gov.in | GJFR |
| Rajasthan | rjfr.agristack.gov.in | RJFR |
| Andhra Pradesh | apfr.agristack.gov.in | APFR |
| Telangana | tgfr.agristack.gov.in | TGFR |
| Assam | asfr.agristack.gov.in | ASFR |
| Bihar | bhfr.agristack.gov.in | BHFR |
| Himachal Pradesh | hpfr.agristack.gov.in | HPFR |
| Uttarakhand | ukfr.agristack.gov.in | UKFR |
| Odisha | odfr.agristack.gov.in | ODFR |
| Haryana | hrfr.agristack.gov.in | HRFR |
| Tamil Nadu | tnfr.agristack.gov.in | TNFR |
| Jharkhand | jhfr.agristack.gov.in | JHFR |
What is Agristack Farmer Registry Portal and how does it work in Digital Agriculture?
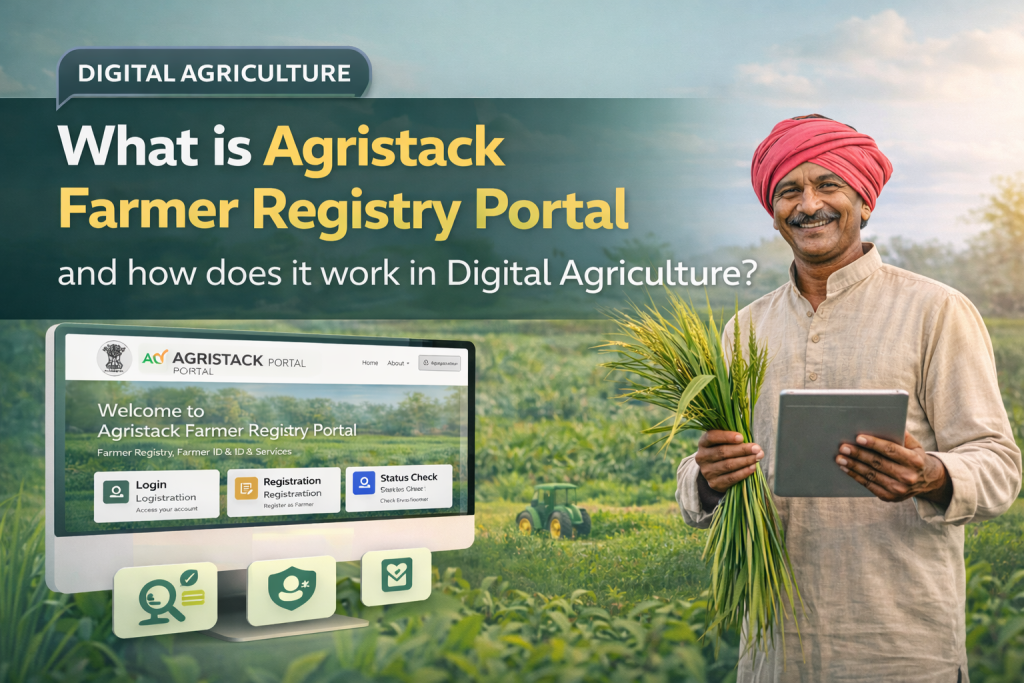
You know that moment when you have to visit three offices just to get one simple thing done? Yes, that’s exactly what this system tries to fix. Instead of running around, everything is brought into one place.
Agristack Farmer Registry Portal is a digital system where farmers can register, log in, check their status, and get a Farmer ID. In simple words, it connects Agristack, Farmer Registry, and Farmer ID so farmers can manage everything from one platform. So, if someone wants to register or check updates, they can do it online without wasting time.
Now let’s break it down so it feels less confusing and more like everyday language.
Agristack is the main system that stores and manages farmer-related information. Think of it like a big digital record book, but smarter and faster. It helps keep all farmer data in one place so nothing gets lost or mixed up.
Farmer Registry is the part where farmer details are recorded. This includes basic information that helps identify each farmer. So, whenever a farmer signs up, their data is saved inside this registry.
Farmer ID is a unique number given to each farmer after registration. It works like a personal ID that helps track records and applications. Just like a school ID helps identify students, this one helps identify farmers.
Digital Agriculture means using technology to manage farming-related work. Instead of paper files and long lines, systems like Agristack Portal make things quicker and easier. So, tasks that once took days can now be done in minutes.
Agristack Portal is the online platform where all of this happens. It allows farmers to access services like Agristack Login, Agristack Registration, and Agristack Status Check. In short, it acts like the main door to enter the whole system.
What is the difference between Agristack, Farmer Registry, and Farmer ID?
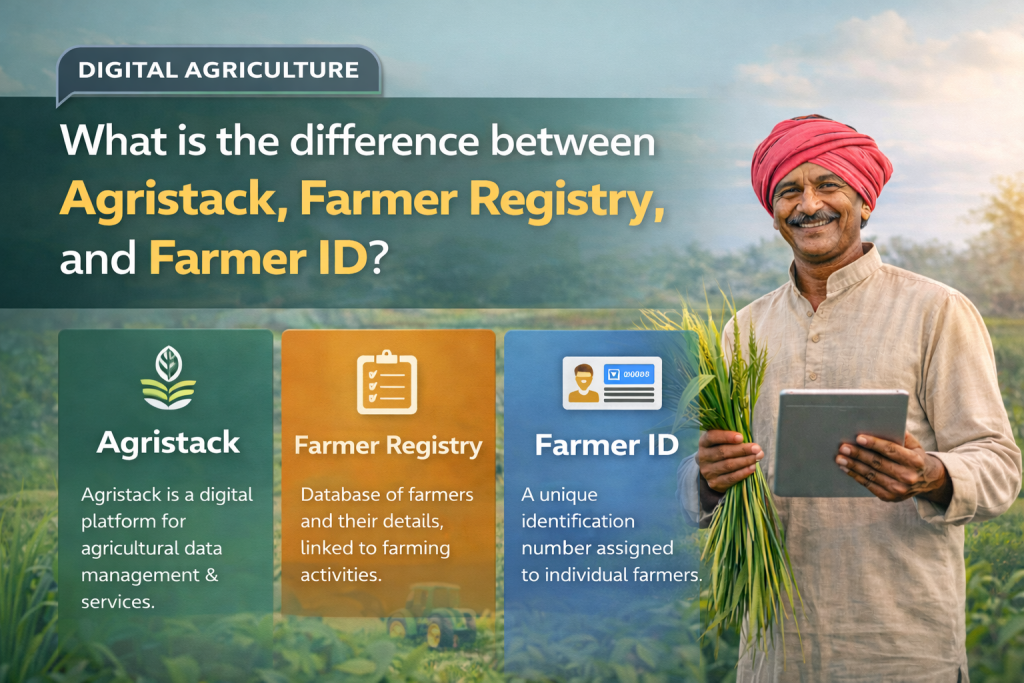
Many people get confused between these three terms, and honestly, that makes sense. They sound similar, but each one has a different role.
Agristack is the complete system, while Farmer Registry is a part of that system, and Farmer ID is the final result you get after registration. So, they are connected, but they are not the same thing.
To make it super clear, here’s a simple table you can understand quickly:
| Entity | Meaning | Purpose |
|---|---|---|
| Agristack | A digital system that manages farmer data | To organize and manage all farmer-related information |
| Farmer Registry | A database where farmer details are stored | To record and maintain farmer information |
| Farmer ID | A unique ID given to each farmer | To identify and track farmers easily |
So, if you look at it step by step, Agristack is the system, Farmer Registry stores the data, and Farmer ID is what the farmer receives at the end.
What services are available on Agristack Portal?
Once you open the Agristack Portal, you will notice that it is not just about registration. Instead, it offers multiple services that make things easier for farmers.
First, there is Agristack Login. This allows users to access their account using a Login ID and Password. So, instead of starting again every time, farmers can simply log in and continue their work.
Next comes Agristack Registration. This is where new users can sign up and enter their details. After completing this step, their data is added to the Farmer Registry.
Then there is Agristack Status Check. This feature helps users track their application. So, instead of guessing what happened, farmers can see their Enrollment Status, Application Status, or Approval Status directly.
Agristack App is also available, which makes access easier on mobile devices. As a result, farmers do not need a computer every time. They can simply use their phone and get things done.
Agristack CSC Login is another important service. This is used by service centers to help farmers complete their process. So, even if someone is not comfortable using the portal, they can still get help.
Finally, Agristack Dashboard gives a clear view of all activities. It shows updates, status, and other important information in one place. So, instead of checking different sections, everything can be seen on one screen.
How to use Agristack Login on Agristack Portal?
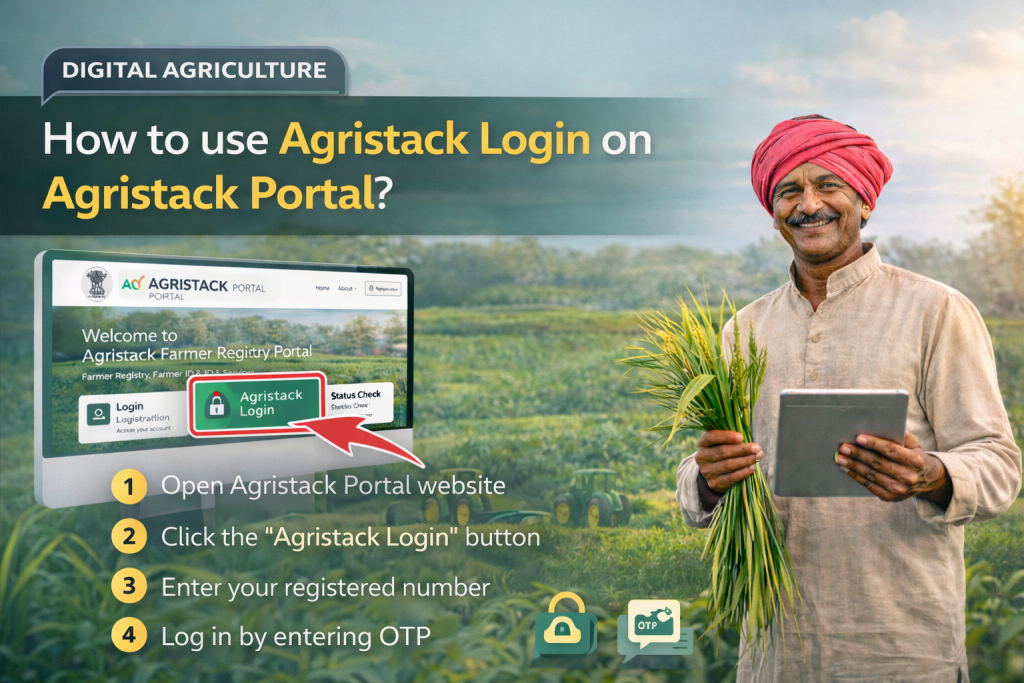
Trying to access your account for the first time can feel confusing. However, once you understand the steps, it becomes as simple as opening a regular website.
Agristack Login is used to enter your account on the Agristack Portal. It allows farmers and users to access their Farmer Registry details, check updates, and continue their work without starting again. So, instead of filling forms repeatedly, everything stays saved in one place.
Before you begin, make sure you have your Login ID and Password ready. Otherwise, you might end up staring at the screen like it owes you an answer.
Step-by-Step Guide for Agristack Login
Follow these steps carefully, and you will be inside your account in no time.
Step 1: Open Agristack Portal
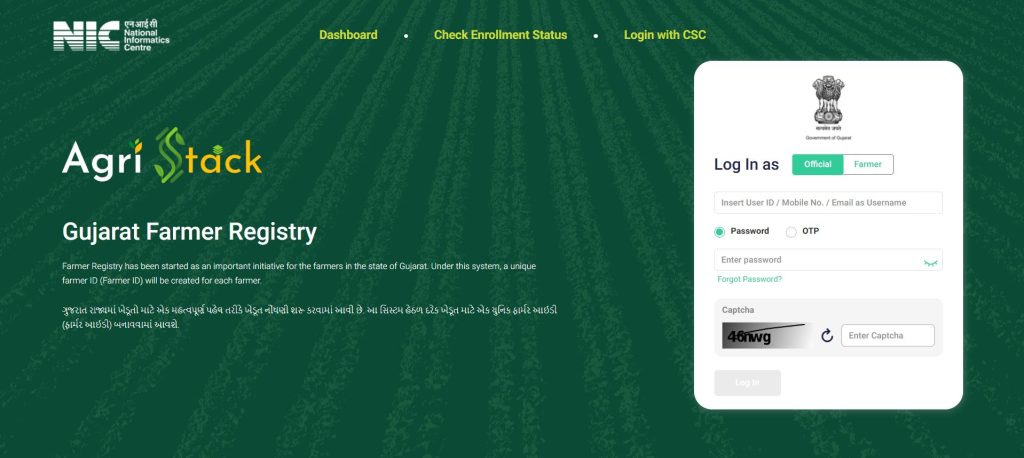
First, open the Agristack Portal on your device. You can use a mobile phone or a computer, depending on what you have.
Step 2: Click Agristack Login
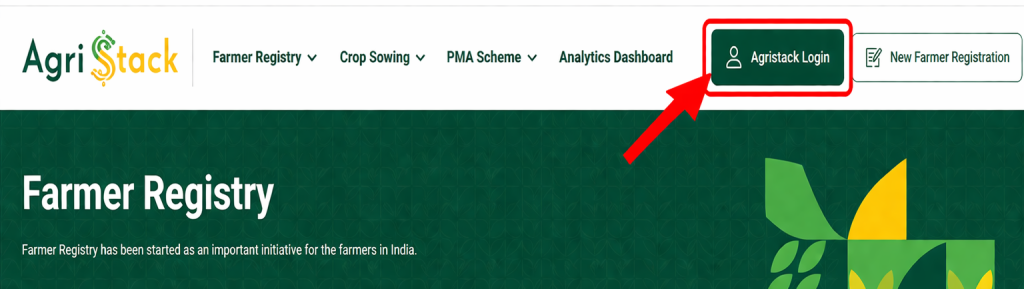
Once the page loads, look for the Agristack Login option. It is usually visible on the main screen.
Step 3: Enter Login ID
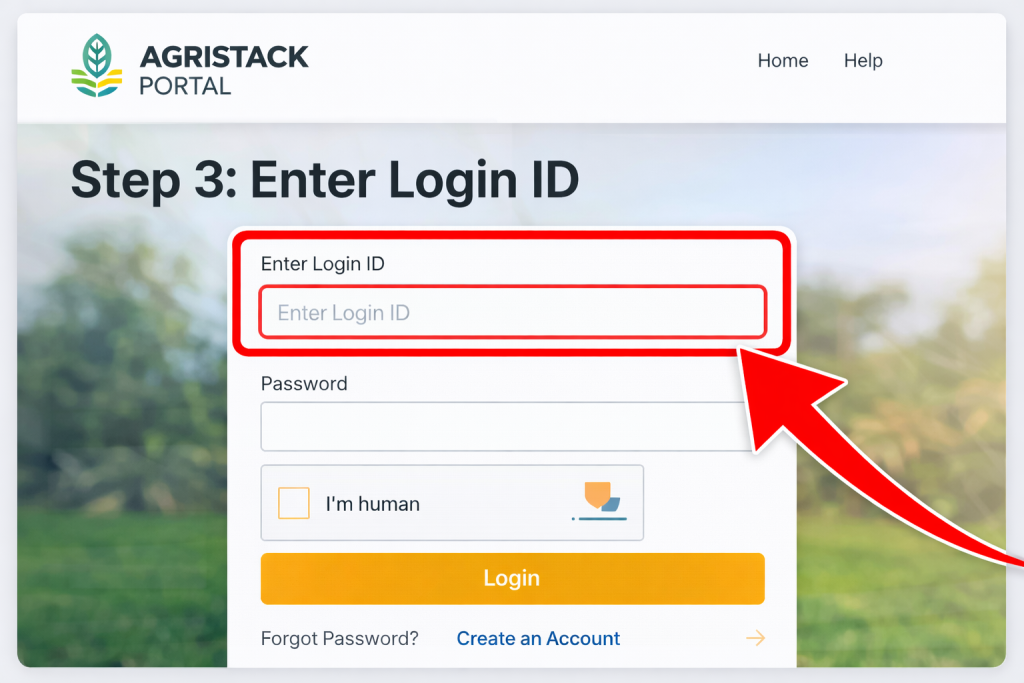
Now, enter your Login ID in the given field. Make sure there are no typing mistakes, or the system might not recognize it.
Step 4: Enter Password
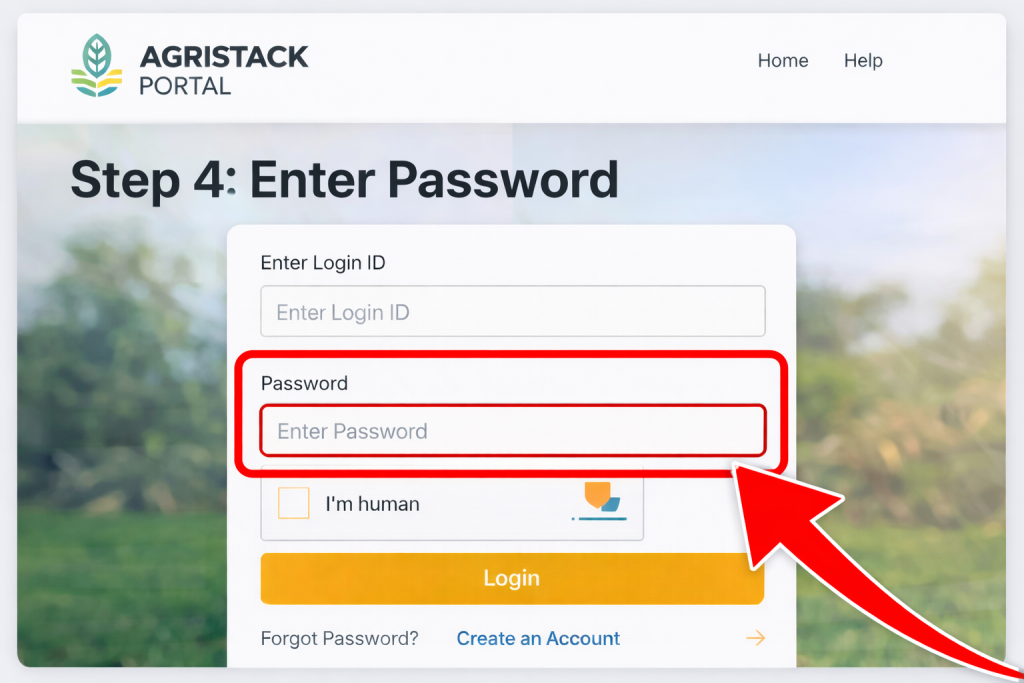
After that, type your Password carefully. If you enter the wrong password, the system will not let you in, no matter how many times you stare at it.
Step 5: Click Login
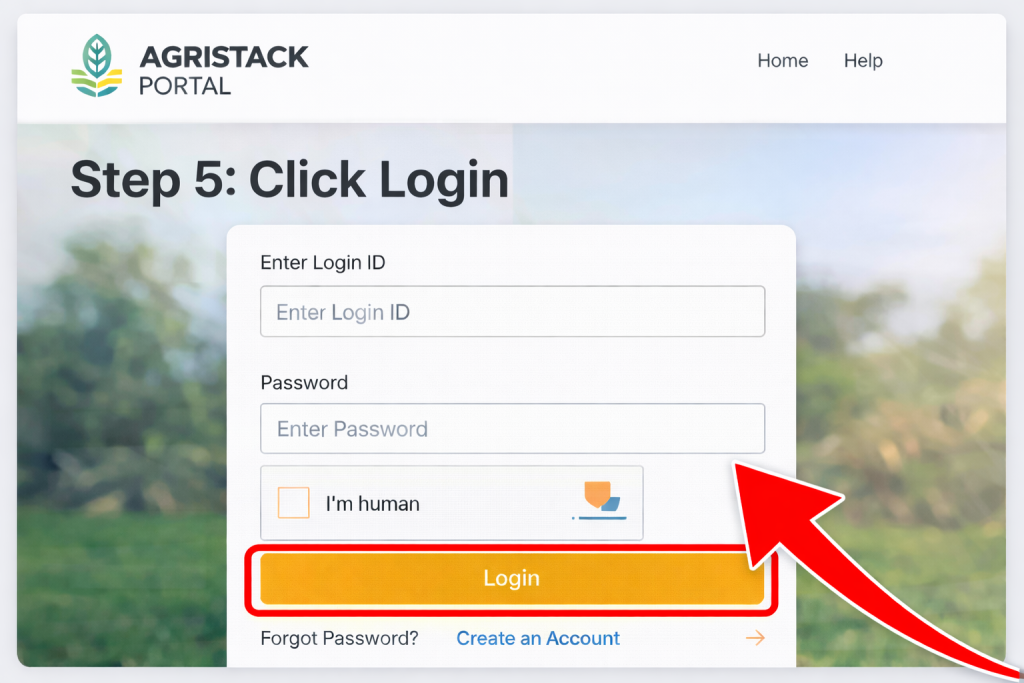
Finally, click the Login button. If all details are correct, your account will open, and you can access your Farmer Registry information.
Once logged in, you can move to other sections like Agristack Status Check or Farmer ID. So, this step is your main entry point to everything else.
What is Agristack CSC Login and how does it work?
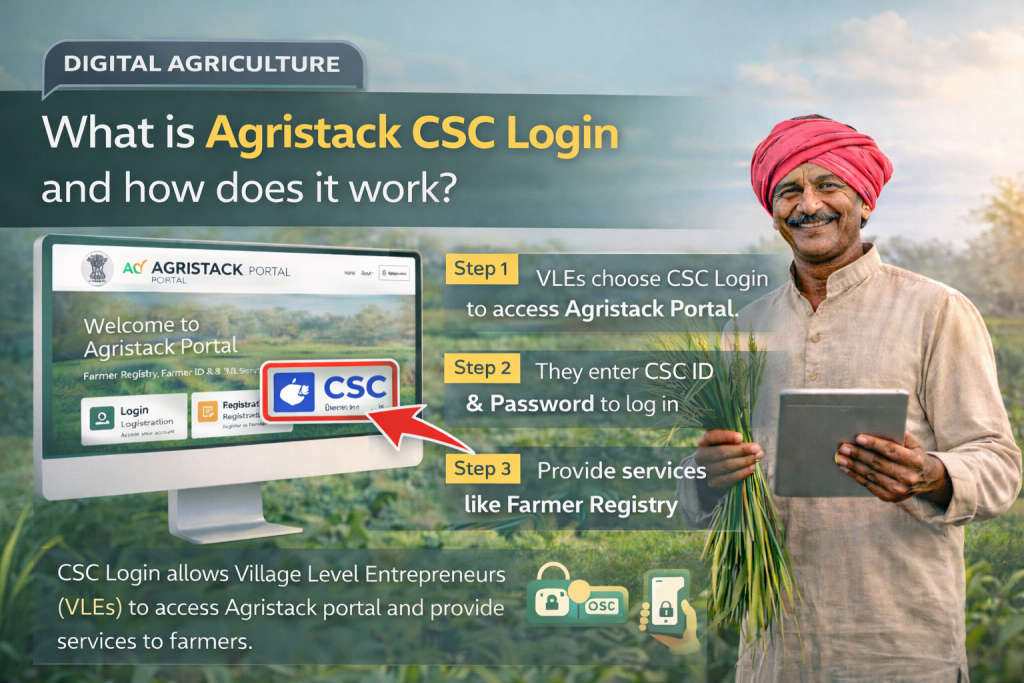
Not everyone feels comfortable using online systems. Because of that, Agristack CSC Login is provided to help users through service centers.
Agristack CSC Login is used by operators at service centers who assist farmers in completing tasks. So, instead of doing everything alone, farmers can visit a center and get help.
CSC Login
CSC Login allows service center operators to access the Agristack Portal using their credentials. Once logged in, they can help farmers with Agristack Registration, Agristack Login, and Agristack Status Check.
This is useful for people who do not have internet access or who find online steps confusing.
Farmer Login
Farmer Login is used directly by farmers who want to access their own accounts. With a Login ID and Password, they can enter the portal and manage their Farmer Registry details.
So, if a farmer is comfortable using a mobile or computer, they can handle everything on their own.
Portal Login
Portal Login is the general access point for all users of the Agristack Portal. It includes both Farmer Login and CSC Login.
In simple words, whether you are a farmer or an operator, Portal Login is the door you use to enter the system.
So, depending on your situation, you can either log in yourself or take help from a service center. Either way, the goal stays the same, which is easy access to your Farmer Registry and Farmer ID.
How to complete Agristack Registration for Farmer Registry?
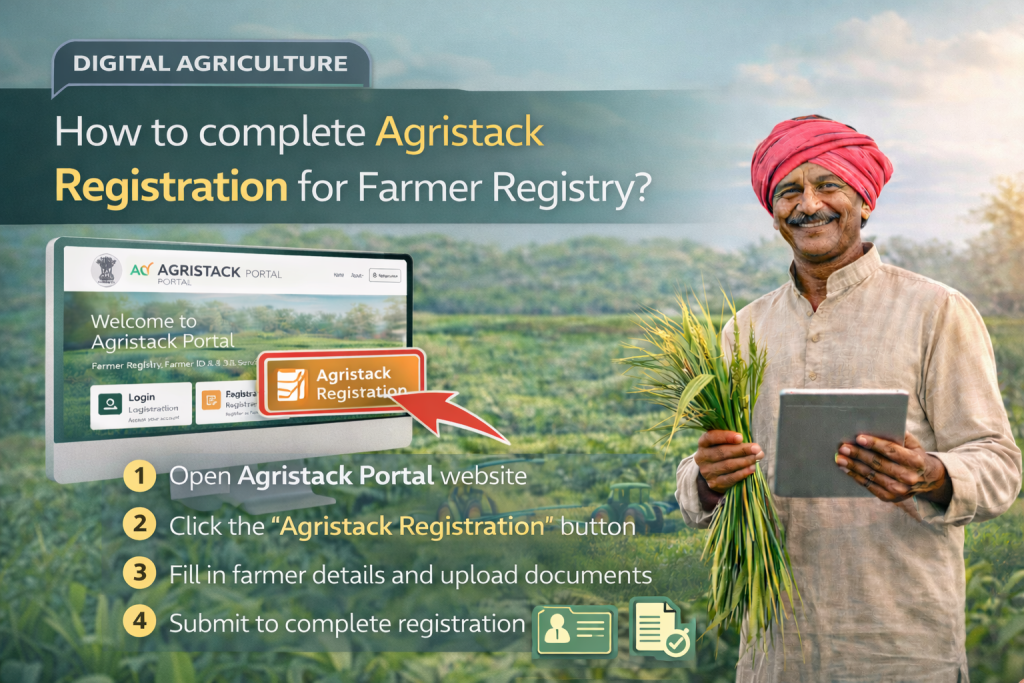
Starting Agristack Registration may feel like a big task at first. However, once you understand the steps, it becomes simple and quick to finish.
Agristack Registration is the process where a farmer enters their details into the Farmer Registry. After this process is complete, the system can generate a Farmer ID. So, this step is very important because everything else depends on it.
Before you begin, keep your details ready. Otherwise, you might get stuck halfway and start wondering why the page is just staring back at you.
Step-by-Step Guide for Agristack Registration
Follow these steps one by one, and your registration will be completed without confusion.
Step 1: Open Agristack Portal
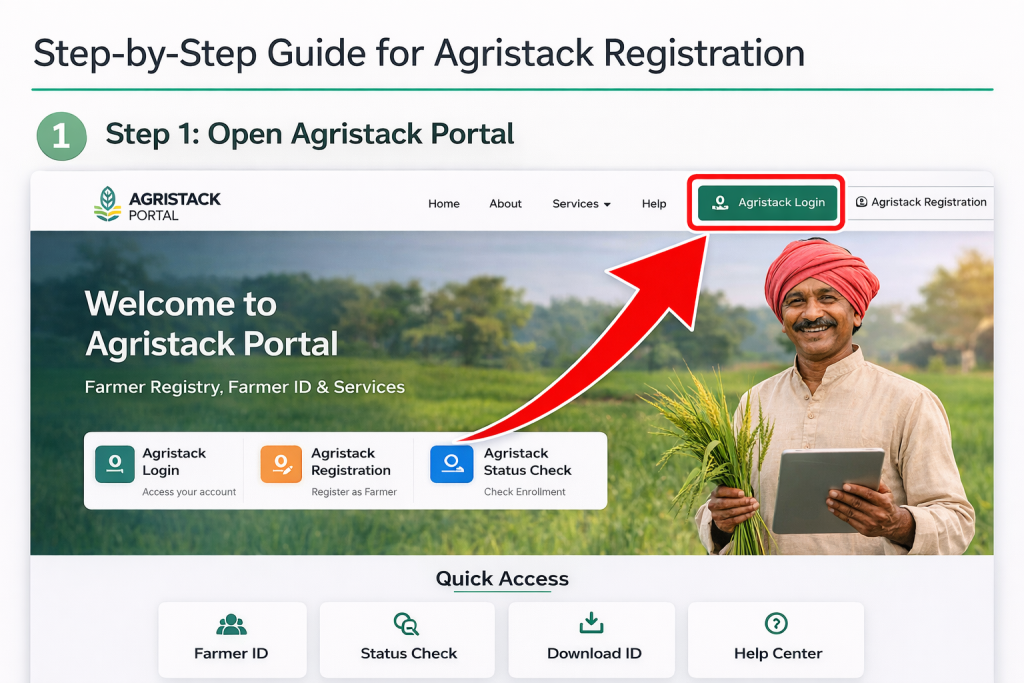
First, open the Agristack Portal using your mobile or computer. Make sure your internet connection is working properly.
Step 2: Click Agristack Registration
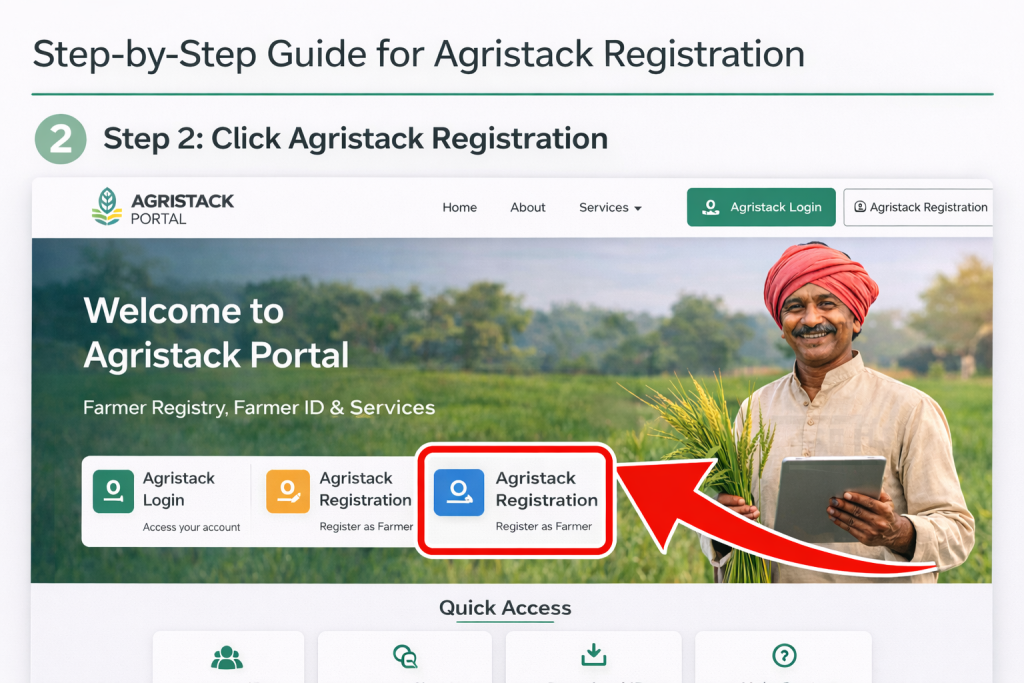
Once the portal opens, find the Agristack Registration option. Click on it to begin the process.
Step 3: Start New User Signup
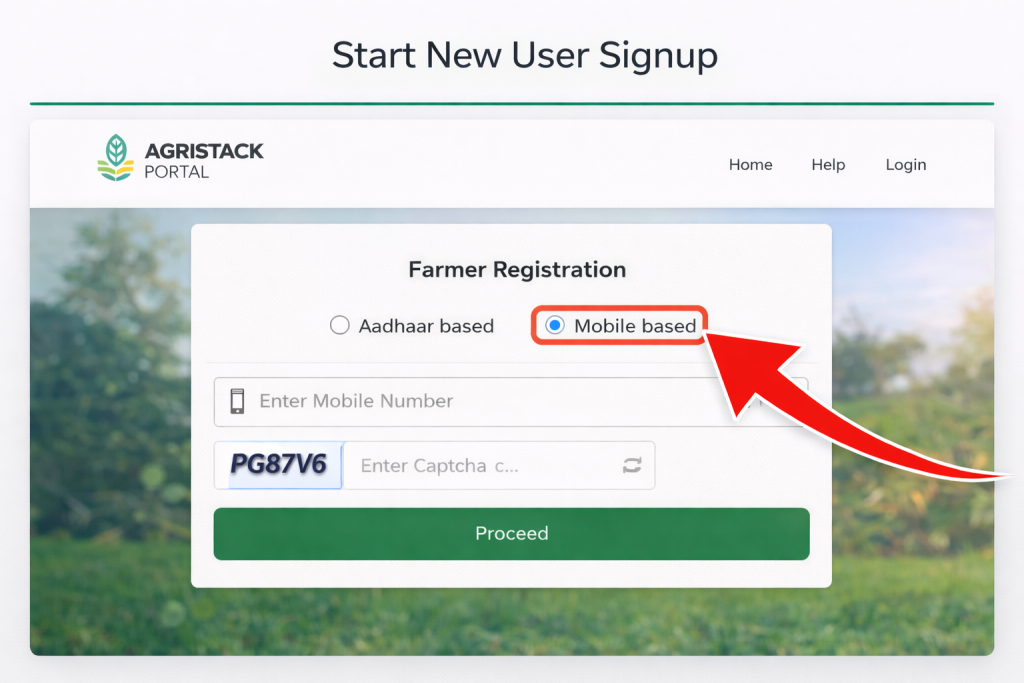
After clicking registration, you will see the New User Signup option. Select it to create your account.
Step 4: Complete Aadhaar eKYC
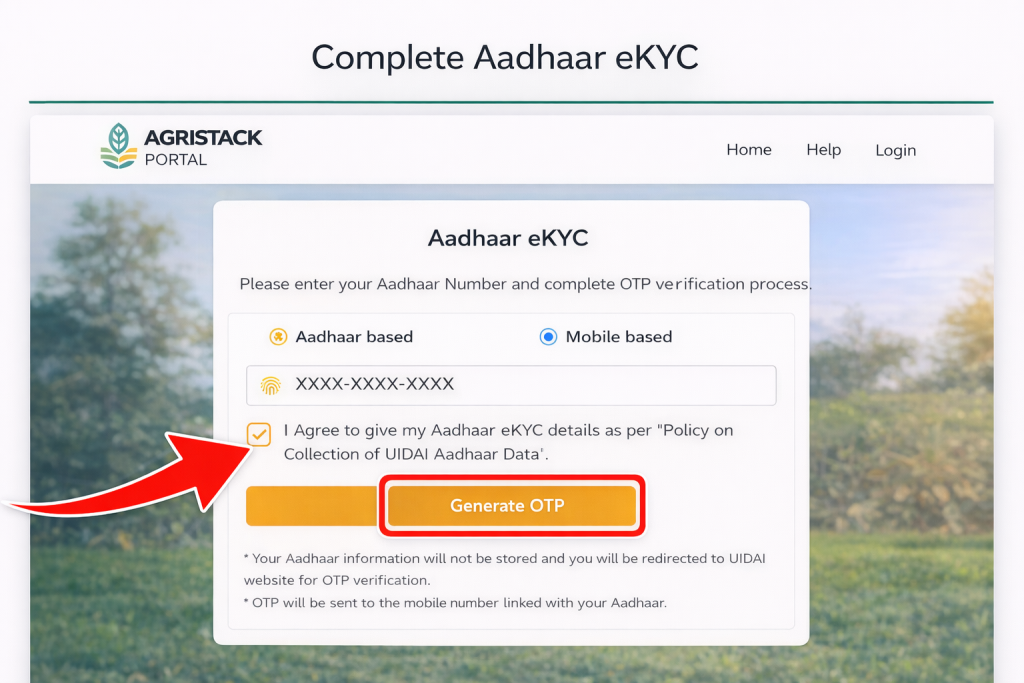
Now, complete Aadhaar eKYC. This step is used to verify your identity. Enter the required details carefully so the system can match your information correctly.
Step 5: Submit Online Registration
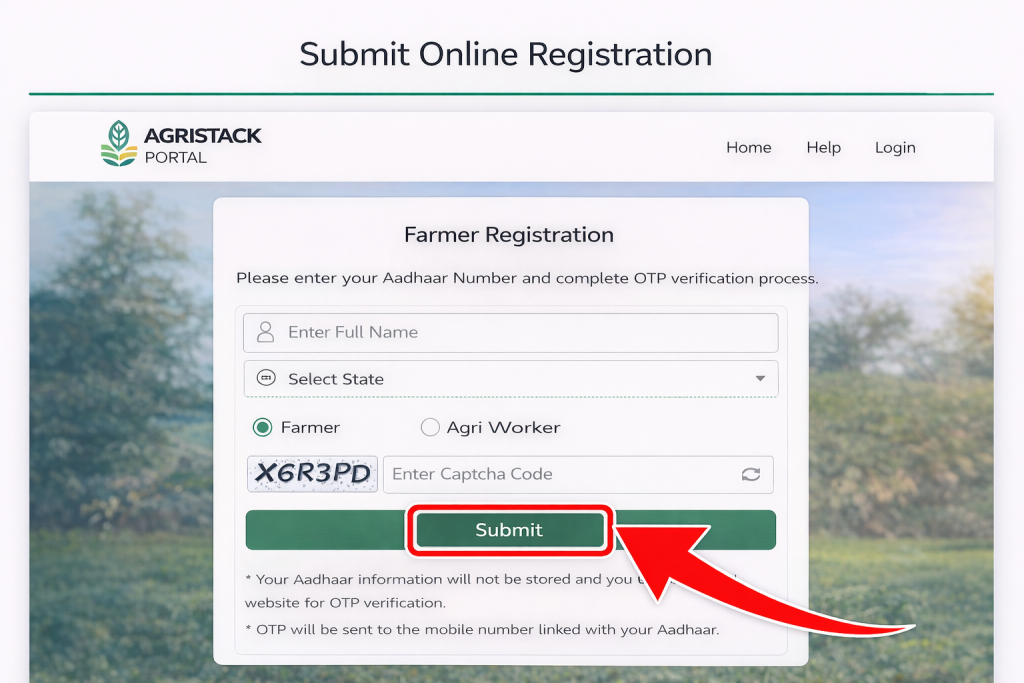
Finally, review all the details and submit the Online Registration form. Once submitted, your data will be added to the Farmer Registry.
After this step, you can later use Agristack Status Check to track your Enrollment Status. So, registration is just the beginning of the process.
What details are required for Farmer Registration in Agristack?
Many users get confused about what information is needed. However, the process is simple if you know what to expect.
Farmer Registration requires basic information that helps create a proper record in the Farmer Registry. This ensures that each farmer gets a unique Farmer ID without errors.
Farmer Registration Details
During Farmer Registration, you need to provide correct personal and basic details. These details help identify you in the system and connect your record properly.
Online Registration Information
For Online Registration, the portal will ask for information step by step. So, you just need to fill in the required fields as shown on the screen.
Make sure the details are correct. Otherwise, your Application Status might show issues later, and fixing them can take extra time.
Aadhaar eKYC Requirement
Aadhaar eKYC is used to confirm your identity during registration. This step connects your details securely with the system.
Once Aadhaar eKYC is completed, your registration becomes valid. After that, your data is safely stored in the Farmer Registry, and you move closer to getting your Farmer ID.
How to do Agristack Status Check for Farmer Registry?
Waiting after registration can feel longer than expected. However, instead of guessing what is happening, you can simply use Agristack Status Check to see the progress.
Agristack Status Check helps you track your Farmer Registry application. It shows whether your details are processed, pending, or approved. So, you do not need to visit any office or ask around.
Before checking, keep your details ready. Otherwise, you might open the page and then forget what you came for.
Step-by-Step Guide for Agristack Status Check
Follow these steps carefully to check your status without confusion.
Step 1: Open Agristack Portal
First, open the Agristack Portal on your mobile or computer. Make sure the page loads properly before moving ahead.
Step 2: Click Agristack Status Check
Once the portal is open, look for the Agristack Status Check option. Click on it to go to the status page.
Step 3: Enter details
Now, enter the required details in the given fields. Double-check what you type because even a small mistake can show incorrect results.
Step 4: View Enrollment Status
Finally, click the submit option to view your Enrollment Status. Your current status will appear on the screen within seconds.
After this, you will clearly know whether your application is moving forward or still waiting. So, instead of guessing, you get a direct answer.
What does Enrollment Status mean in Agristack?
Many users see different status messages and feel confused. However, each status has a simple meaning if you understand it properly.
Enrollment Status shows the current stage of your Farmer Registry application. It helps you understand what is happening after registration.
Enrollment Status
Enrollment Status is the main status shown after you check your details. It tells you whether your registration is pending, processed, or approved.
So, this is the first thing you should look at when checking your application.
Farmer ID Status
Farmer ID Status shows whether your Farmer ID has been created or not. If it is ready, you can use it for further steps.
If not, it means the process is still going on.
Application Status
Application Status gives a general update about your submission. It shows whether your details are under review or still in process.
So, this helps you understand the overall progress of your application.
Approval Status
Approval Status shows whether your registration has been accepted. If approved, your Farmer Registry process is complete.
What is Agristack Farmer ID and how to use Farmer ID Card?
After completing registration, one thing matters the most, and that is your Agristack Farmer ID. Without it, your Farmer Registry record is incomplete, so this step is important.
Agristack Farmer ID is a unique number given to each farmer in the system. It works as a digital identity that helps the system recognize you. So, whenever you log in or check your details, this ID connects everything.
Now, think of it like a school ID card. Without it, you are still a student, but things become harder to manage. In the same way, Farmer ID makes everything easier inside the Agristack Portal.
Agristack Farmer ID
Agristack Farmer ID is created after your registration is approved. It is linked directly to your Farmer Registry details, which means all your information is connected to this single ID.
Because of this, the system can quickly find your records whenever needed. So, instead of searching again and again, everything stays organized.
Farmer ID Card
Farmer ID Card is the digital version of your Farmer ID. It shows your identity in a clear format, which can be used whenever required.
You can keep it saved or printed, depending on your need. So, if you ever need to show your details, the card is ready.
Farmer Identity
Farmer Identity simply means how the system recognizes you as a registered farmer. Your Agristack Farmer ID becomes your official identity inside the portal.
Because of this, your records stay linked, and your details remain easy to access. So, everything revolves around this one ID once it is created.
How to Download Farmer ID from Agristack Portal?
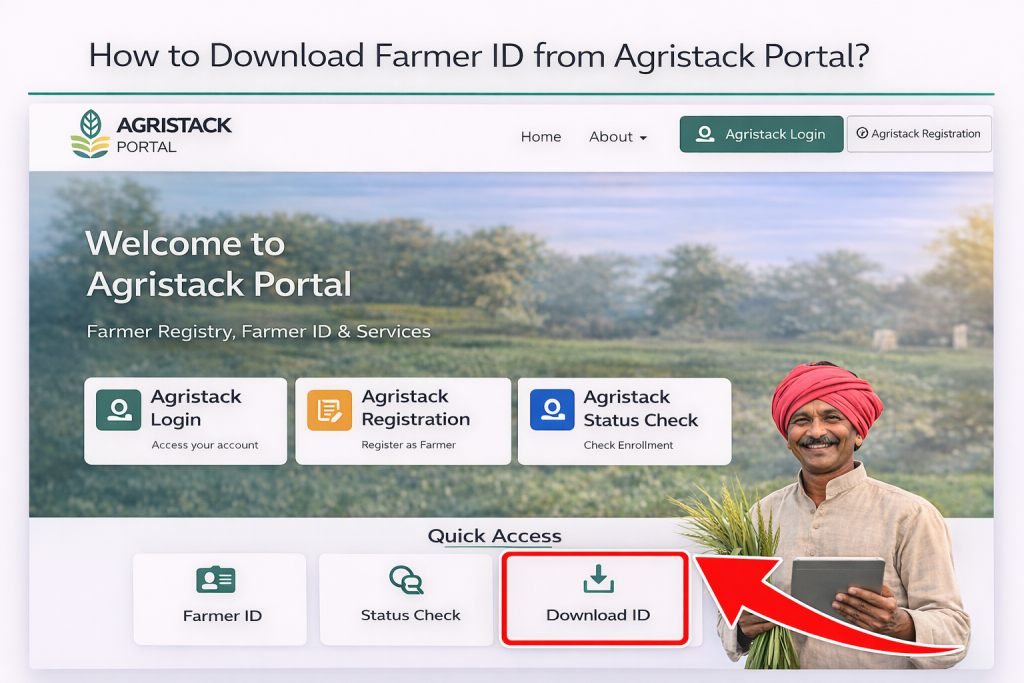
Once your Farmer ID is ready, the next step is to download it. The good part is that the process is simple and does not take much time.
Before starting, make sure you can access your account. Otherwise, you might keep clicking buttons and wondering why nothing is happening.
Step-by-Step Guide to Download Farmer ID
Follow these steps carefully to download your Farmer ID without any trouble.
Step 1: Login to Agristack Portal
First, open the Agristack Portal and complete your Agristack Login. Enter your Login ID and Password correctly to access your account.
Step 2: Go to Farmer ID section
After logging in, find the Farmer ID section on the portal. This is where your ID details are stored.
Step 3: Click Download Farmer ID
Now, click on the Download Farmer ID option. Make sure you select the correct option if multiple choices are shown.
Step 4: Get PDF Download
Finally, your Farmer ID will be available as a PDF Download. Save it on your device so you can use it whenever needed.
Once downloaded, you can keep it safe for future use. And honestly, it feels nice when everything is finally done and sitting right there in your folder.
How to use UP Agristack (UPFR Agristack) for Farmer Registry UP?
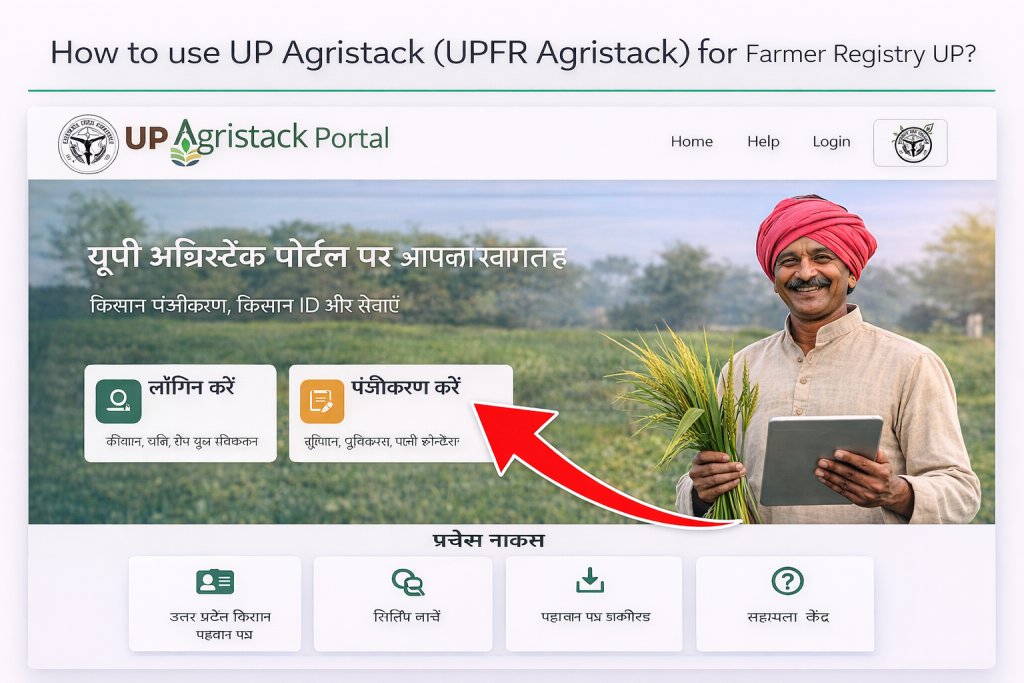
If you are from Uttar Pradesh, then UP Agristack is the place where everything starts. Instead of visiting offices again and again, you can complete your Farmer Registry UP work online.
UPFR Agristack is the state version of Agristack used for Uttar Pradesh Farmer Registry. It is available on upfr.agristack.gov.in, where farmers can register, log in, and check their status. So, everything related to Farmer Registry UP is handled through this portal.
Before starting, make sure you have your details ready. Otherwise, you might open the page and then forget what you came for.
Steps to use UP Agristack
Follow these steps carefully to use UPFR Agristack without confusion.
UP Agristack Login
First, open upfr.agristack.gov.in and go to the login section. Enter your Login ID and Password to access your account.
UPFR Login
UPFR Login works the same way as Agristack Login. It gives you access to your Farmer Registry UP details so you can continue your process.
UP Farmer Registration
If you are a new user, you need to complete UP Farmer Registration. Enter your details and complete the process so your record is added to the system.
UPFR Status Check
After registration, you can use UPFR Status Check to track your progress. This helps you see whether your application is pending or approved.
UPFR Registration Online
UPFR Registration Online allows you to complete the process from home. So, you do not need to visit any office unless help is required.
UP Agristack CSC Login
If you need assistance, UP Agristack CSC Login is available. Service center operators can log in and help you complete your registration or status check.
Farmer Registry UP
Once everything is done, your details are stored in Farmer Registry UP. After that, your Farmer ID will be created, and you can use it whenever needed.
How to access Agristack Maharashtra (MHFR Agristack) Portal?
For farmers in Maharashtra, the process is handled through Agristack Maharashtra. Just like UPFR Agristack, this system is made for state-level Farmer Registry work.
MHFR Agristack is available on mhfr.agristack.gov.in. It allows farmers to register, log in, check status, and get their Farmer ID Maharashtra. So, all activities are managed through the Agristack Maharashtra Portal.
Before starting, check your internet connection. Otherwise, you may end up refreshing the page more than needed.
Steps to access Agristack Maharashtra
Follow these steps to use MHFR Agristack properly.
Maharashtra Login
Open mhfr.agristack.gov.in and go to the login section. Enter your Login ID and Password to access your account.
MHFR Login
MHFR Login is used to open your Farmer Registry account. Once logged in, you can view your details and continue your process.
Farmer Registration Maharashtra
If you have not registered yet, complete Farmer Registration Maharashtra. Enter your details carefully so your record is added correctly.
Maharashtra Status Check
After registration, use Maharashtra Status Check to see your application progress. This helps you know whether your details are under review or approved.
Farmer ID Maharashtra
Once your registration is approved, your Farmer ID Maharashtra will be created. This ID is used as your identity in the system.
Agristack Maharashtra Portal
Agristack Maharashtra Portal is where all these steps take place. From login to status check, everything is handled in one place.
How to use Agristack Kerala (KLFR Agristack) for Farmer Registry Kerala?
If you are from Kerala, then Agristack Kerala is the platform you need. It helps you complete Farmer Registry Kerala work without unnecessary steps.
KLFR Agristack is available on klfr.agristack.gov.in. It is designed for Kerala Farmer Registry, where farmers can register and manage their details. So, everything related to Farmer Registry Kerala is done through this portal.
Before starting, keep your details ready. This will help you complete the process without delays.
Steps to use Agristack Kerala
Follow these steps to use KLFR Agristack easily.
Kerala Login
First, open klfr.agristack.gov.in and go to the login section. Enter your Login ID and Password to access your account.
Kerala Registration
If you are new, complete Kerala Registration by entering your details. This step adds your information to the system.
Farmer Registry Kerala
After registration, your details are stored in Farmer Registry Kerala. This ensures your record is saved correctly.
Agristack Kerala Login
Agristack Kerala Login allows you to access your account anytime. So, you can check updates or continue your process whenever needed.
Agristack Kerala Registration
Agristack Kerala Registration is the process of adding your details to the system. Once completed, you move forward to status check and Farmer ID creation.
How to access Agristack Gujarat for Gujarat Farmer Registry?
If you are from Gujarat, then Agristack Gujarat is where your Farmer Registry work happens. Instead of running around, you can manage everything online in one place.
Agristack Gujarat is used for Gujarat Farmer Registry. It allows farmers to register, log in, and get their Farmer ID Gujarat without extra steps. So, the process stays simple and easy to follow.
Before starting, keep your login details ready. Otherwise, you may end up resetting your password again, and nobody enjoys that.
Steps to access Agristack Gujarat
Follow these steps to use the portal properly.
Gujarat Login
First, open the Agristack Gujarat portal and go to the login section. Enter your Login ID and Password to access your account.
Gujarat Registration
If you are new, complete Gujarat Registration by entering your details. This step adds your information to the Gujarat Farmer Registry.
Agristack Gujarat Login
Agristack Gujarat Login lets you return anytime to check updates. So, you can track your progress whenever needed.
Farmer ID Gujarat
After approval, your Farmer ID Gujarat will be created. This ID becomes your identity in the system and helps you access your details easily.
How to use Agristack Rajasthan for Farmer Registry Rajasthan?
For farmers in Rajasthan, Agristack Rajasthan handles the entire Farmer Registry Rajasthan process. It keeps everything in one place so you do not get lost between steps.
Agristack Rajasthan is used to register farmers and manage their records. So, once you complete the process, your details are stored safely in the system.
Before starting, make sure your details are correct. Even a small mistake can slow things down.
Steps to use Agristack Rajasthan
Follow these steps carefully.
Rajasthan Login
Open the Agristack Rajasthan portal and go to the login section. Enter your Login ID and Password to access your account.
Rajasthan Registration
If you have not registered yet, complete Rajasthan Registration by entering your details. This step adds you to the system.
Farmer Registry Rajasthan
After registration, your details are saved in Farmer Registry Rajasthan. So, your record becomes part of the official database.
How to access Agristack Assam for Farmer Registry Assam?
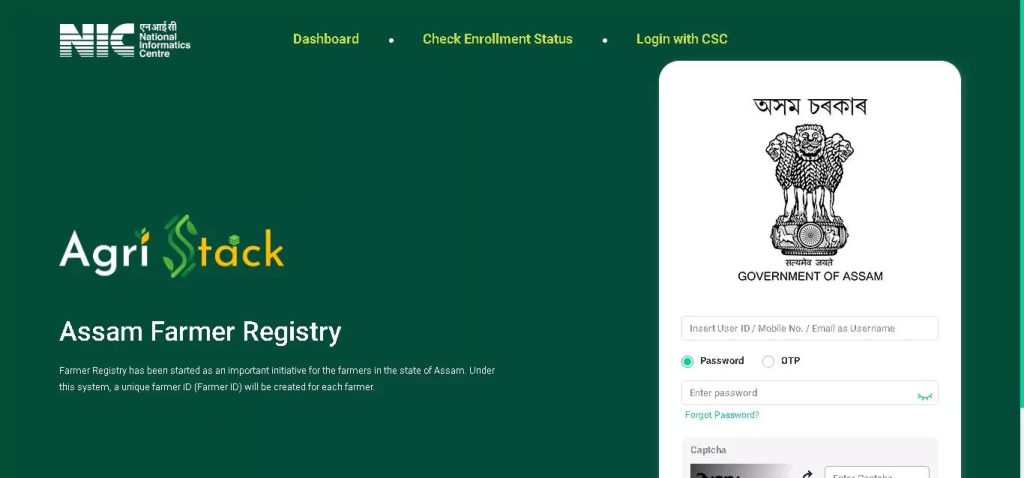
If you are from Assam, Agristack Assam is the platform you need. It helps you complete Farmer Registry Assam work without confusion.
Agristack Assam is designed to manage farmer records in the state. So, all your details stay in one place once you register.
Before starting, check your connection. Otherwise, you may refresh the page more times than you would like.
Steps to access Agristack Assam
Follow these steps to get started.
Assam Login
First, open the Agristack Assam portal and go to the login section. Enter your Login ID and Password to access your account.
Assam Registration
If you are a new user, complete Assam Registration by entering your details. This adds your record to the system.
Farmer Registry Assam
Once registered, your details are stored in Farmer Registry Assam. So, your information stays safe and easy to access.
How to use CG Agristack (Agristack Chhattisgarh) for Farmer Registry CG?
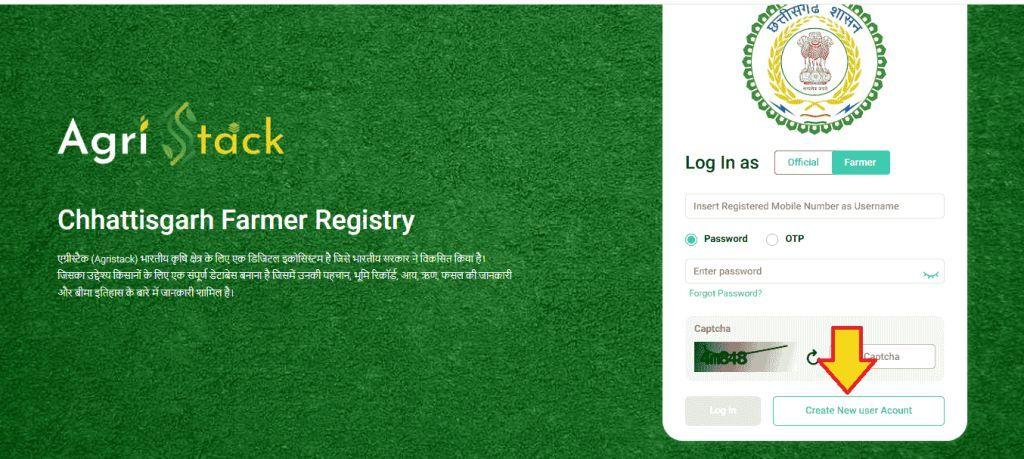
For Chhattisgarh, the system is known as CG Agristack. It works just like other state portals but is focused on Farmer Registry CG.
Agristack Chhattisgarh helps farmers register, log in, and check their status. So, everything is handled through one platform.
Before starting, keep your details ready. This saves time and avoids repeated steps.
Steps to use CG Agristack
Follow these steps to complete your process.
CG Login
Open the CG Agristack portal and go to the login section. Enter your Login ID and Password to access your account.
CG Registration
If you are new, complete CG Registration by entering your details. This adds your information to the system.
CG Status Check
After registration, use CG Status Check to see your progress. This shows whether your application is pending or approved.
Farmer Registry CG
Once everything is complete, your details are stored in Farmer Registry CG. So, your record becomes part of the system.
How to access Agristack Telangana for Telangana Farmer Registry?
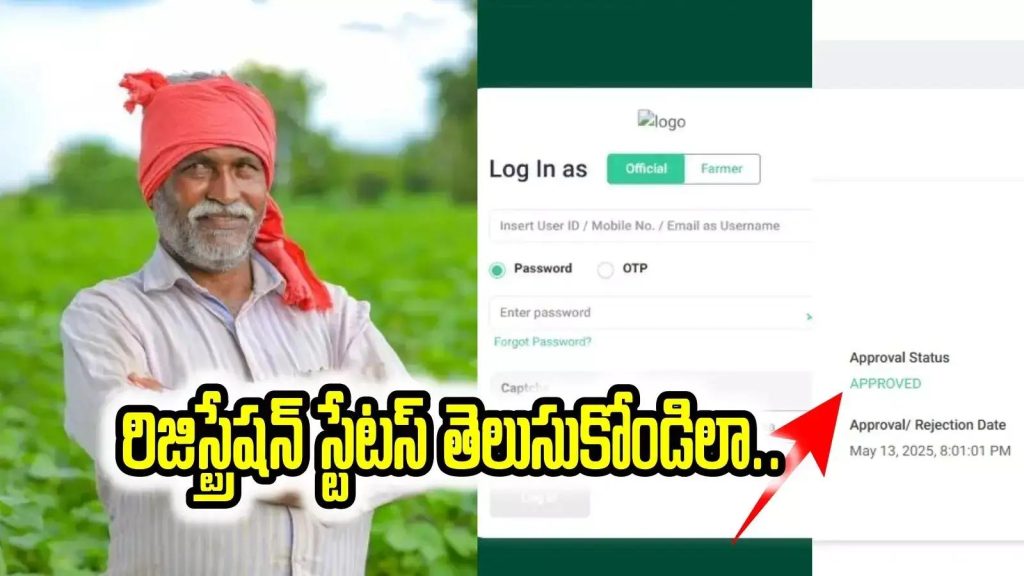
For Telangana farmers, Agristack Telangana is the main platform. It helps you complete your Telangana Farmer Registry work without extra effort.
Agristack Telangana allows you to register, log in, and get your Farmer ID Telangana. So, all your details stay in one place.
Before starting, make sure your login details are correct. Otherwise, you might spend more time fixing errors than completing the process.
Steps to access Agristack Telangana
Follow these steps to use the portal.
Telangana Login
Open the Agristack Telangana portal and go to the login section. Enter your Login ID and Password to access your account.
Telangana Registration
If you have not registered yet, complete Telangana Registration by entering your details. This step adds your record to the system.
Farmer ID Telangana
After approval, your Farmer ID Telangana will be created. This ID becomes your identity for future use.
How to use Agristack Haryana for Farmer Registry Haryana?
If you are from Haryana, Agristack Haryana is where your Farmer Registry Haryana process happens. It keeps everything simple and easy to manage.
Agristack Haryana is used to register farmers and store their details. So, once your registration is done, your information is saved in the system.
Before starting, double-check your details. It saves time and avoids unnecessary delays.
Steps to use Agristack Haryana
Follow these steps to complete your process.
Haryana Login
Open the Agristack Haryana portal and go to the login section. Enter your Login ID and Password to access your account.
Haryana Registration
If you are new, complete Haryana Registration by entering your details. This step adds your information to the system.
Farmer Registry Haryana
After registration, your details are stored in Farmer Registry Haryana. So, your record becomes part of the official database.
What is the complete workflow of Agristack Portal from Registration to Farmer ID?
If everything still feels scattered, do not worry. Let’s connect all the steps so you can clearly see how the Agristack Portal works from start to finish.
The full process moves in a simple flow. First, you complete Agristack Registration. After that, you track progress using Agristack Status Check. Then, you access your account through Agristack Login. Once approved, your Farmer ID is created, and finally, you download it.
So, instead of thinking of it as many steps, think of it like a straight road. You just keep moving forward without turning back.
Also, each step depends on the previous one. If registration is incomplete, status will not show correctly. In the same way, without approval, Farmer ID will not be generated.
Now, let’s break the workflow into a clear table so you can understand it at a glance.
Agristack Workflow Table
| Step | Process | Output |
|---|---|---|
| 1 | Agristack Registration | Enrollment |
| 2 | Agristack Status Check | Approval Status |
| 3 | Agristack Login | Account Access |
| 4 | Farmer ID Generation | Farmer ID |
| 5 | Download Farmer ID | PDF Download |
This table shows the exact journey from start to finish. First comes enrollment, then approval, then access, and finally your Farmer ID.
FAQs
What is Agristack and why is it important for Farmer Registry?
Agristack is a system that stores farmer data in one place. It connects Farmer Registry, Farmer ID, and services on the Agristack Portal. Because of this, farmers can manage their details easily without repeating the same process again and again.
How can I complete Agristack Registration on the portal?
You can complete Agristack Registration by opening the Agristack Portal and selecting the registration option. Then, you fill in your details and complete Aadhaar eKYC. After submission, your Enrollment process starts.
What is Agristack Login and how do I access it?
Agristack Login is used to access your account on the portal. You need your Login ID and Password to enter. Once logged in, you can check your details, status, and Farmer ID.
How do I check Agristack Status Check for my application?
You can use Agristack Status Check by visiting the portal and entering your details. After submitting, your Enrollment Status will appear on the screen. This shows whether your application is pending or approved.
What is Agristack Farmer ID and why do I need it?
Agristack Farmer ID is a unique number given after approval. It works as your Farmer Identity in the system. So, you need it to access your records and use services on the portal.
How can I download Farmer ID from Agristack Portal?
First, complete Agristack Login and go to the Farmer ID section. Then, click on Download Farmer ID. Your ID will be available as a PDF Download, which you can save or print.
What is Agristack CSC Login and when should I use it?
Agristack CSC Login is used by service centers to help farmers. If you cannot complete the process yourself, you can visit a center where an operator uses CSC Login to assist you.
What does Enrollment Status mean in Agristack?
Enrollment Status shows the current stage of your application. It can be pending, under review, or approved. So, it helps you understand what is happening after registration.
Can I use Agristack App instead of the portal?
Yes, Agristack App can be used if available. It provides the same features like login, registration, and status check. So, you can use it on your phone instead of opening the portal.
Is Farmer Registry different for each state in Agristack?
Yes, each state has its own system like UP Agristack, MHFR Agristack, or KLFR Agristack. However, the process remains similar. Only the portal changes, while steps like login, registration, and status check stay almost the same.
Final Words
Agristack Farmer Registry Portal makes the whole process simple, clear, and easy to follow. You start with Agristack Registration, then check progress using Agristack Status Check, and after approval, you get your Farmer ID.
Everything is connected inside the Agristack Portal, so you do not have to repeat steps again. Whether it is Agristack Login, downloading your Farmer ID, or checking updates, all actions happen in one place.
Also, each state portal like UP Agristack, MHFR Agristack, or KLFR Agristack follows the same flow. So, once you understand the process, you can use it without confusion anywhere.
Just follow the steps properly, keep your details correct, and things will move smoothly. And honestly, once your Farmer ID is in your hands, it feels like the whole effort was worth it.